
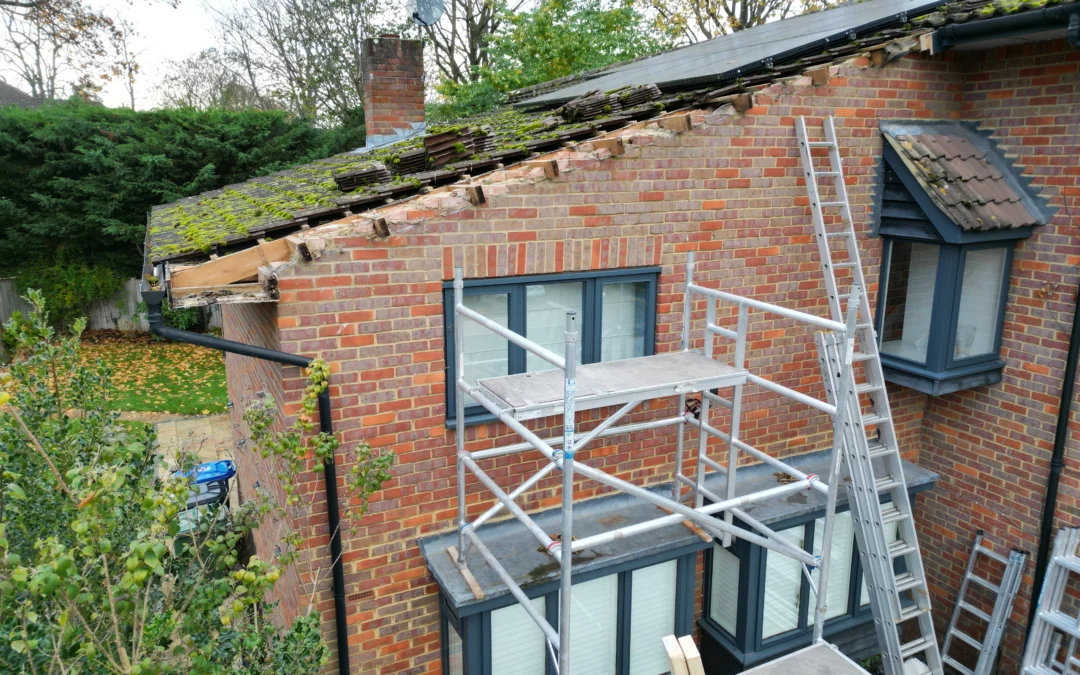
Knowing what to expect during a major home improvement project makes the whole experience significantly less stressful. A roof replacement is disruptive by nature. There will be noise, there will be scaffolding on your house for several days, and there will be moments where your loft has temporary exposure to the elements. But when you understand what’s happening and why at each stage, it stops feeling like chaos and starts feeling like progress. Here’s a clear, honest walkthrough of what we do and why.
Before Work Starts: Survey and Preparation
A good roofing contractor will always survey the roof before committing to a final price. This isn’t just about measuring up, it’s about inspecting the structure from above and, where possible, from within the loft. Hidden problems like rotten rafters, damaged ceiling joists, or degraded insulation may not affect the quote significantly, but they need to be documented so there are no surprises once stripping begins.
You’ll also agree materials at this stage tile type, colour, felt specification, and any other specifics. It’s worth keeping a clear written record of exactly what’s been agreed, along with the total price including scaffold and VAT.
On your side, a little preparation makes the process smoother. Move any vehicles from under or near the roof line if possible. Secure anything fragile in the loft, as vibration from the work above can shake things loose. And let any immediate neighbours know work is happening. It’s a courtesy they’ll appreciate.
Day One: Scaffold Erection
Scaffold is not optional for a safe re-roof. Any contractor offering to do a full roof replacement without scaffold is prioritising their profit margin over the safety of their workers and the protection of your property. Full scaffold allows roofers to move freely across the roof, provides a safe working platform at height, and protects your gutters, windows, and walls from falling materials.
For a standard three-bedroom semi, scaffold erection typically takes half a day. The scaffold will remain in place for the full duration of the project and for a day or two at the end while final inspections are carried out.
Day Two: Stripping the Old Roof
Stripping day is the noisiest day of the project. The old tiles are removed and either stacked for reuse (if salvageable and specified), broken up, or loaded into a skip. The old felt and battens are removed, and for the first time in potentially decades, the underlying rafter structure is fully exposed and inspectable.
This inspection stage matters enormously. Our team checks every rafter and ceiling joist for signs of rot, insect damage, or structural weakness. We check the condition of any existing insulation. We look at how ventilation is currently handled. If anything needs attention before the new roof goes on, this is when it gets done because once the new materials go over the top, the opportunity to address it easily is gone.
Days Two to Four: Felt, Battens, and Tiling
Once the structure is confirmed sound (and any remedial work is completed), a new breathable membrane is laid across the roof from bottom to top, lapping correctly at each run to ensure any water finding its way through the tile surface is directed toward the gutter. Breathable membrane unlike the old non-breathable black felt it’s replaced allows moisture vapour from the house to escape, which is important for preventing condensation buildup in the loft space.
New treated timber battens are then fixed horizontally across the rafters, and tiling begins from the eaves up. Every course of tiles is fixed securely in exposed locations, every tile is individually nailed or clipped. Valleys, hips, and any other roof features are worked carefully as the tiling progresses.
The Finish: Ridge, Flashing, and Gutters
The ridge tiles, the row that caps the very apex of the roof, are traditionally bedded in mortar. An increasing number of installations now use a dry-ridge system instead, which eliminates the mortar joint and reduces future maintenance. We’ll always discuss the options and our recommendation for your specific project.
Lead flashing around the chimney, in valleys, and around any skylights or roof lights is cut and dressed into place. This is skilled work that makes a significant difference to the long-term watertightness of the finished roof, and it’s an area where quality really does show.
Before the scaffold comes down, we carry out a full inspection of the finished roof and clear the site thoroughly. Gutters are cleaned out as part of this process stripping debris often finds its way into downpipes during a re-roof.
At Will Fix It Home Improvements, we don’t consider a job finished until everything is clean, inspected, and you’re entirely happy. Find out more about our new roof service here.
Click here to see more: The Complete Guide to Getting a New Roof: Everything UK Homeowners Need to Know